1. cursor安装 #
2. cursor注册 #
3. cursor设置 #
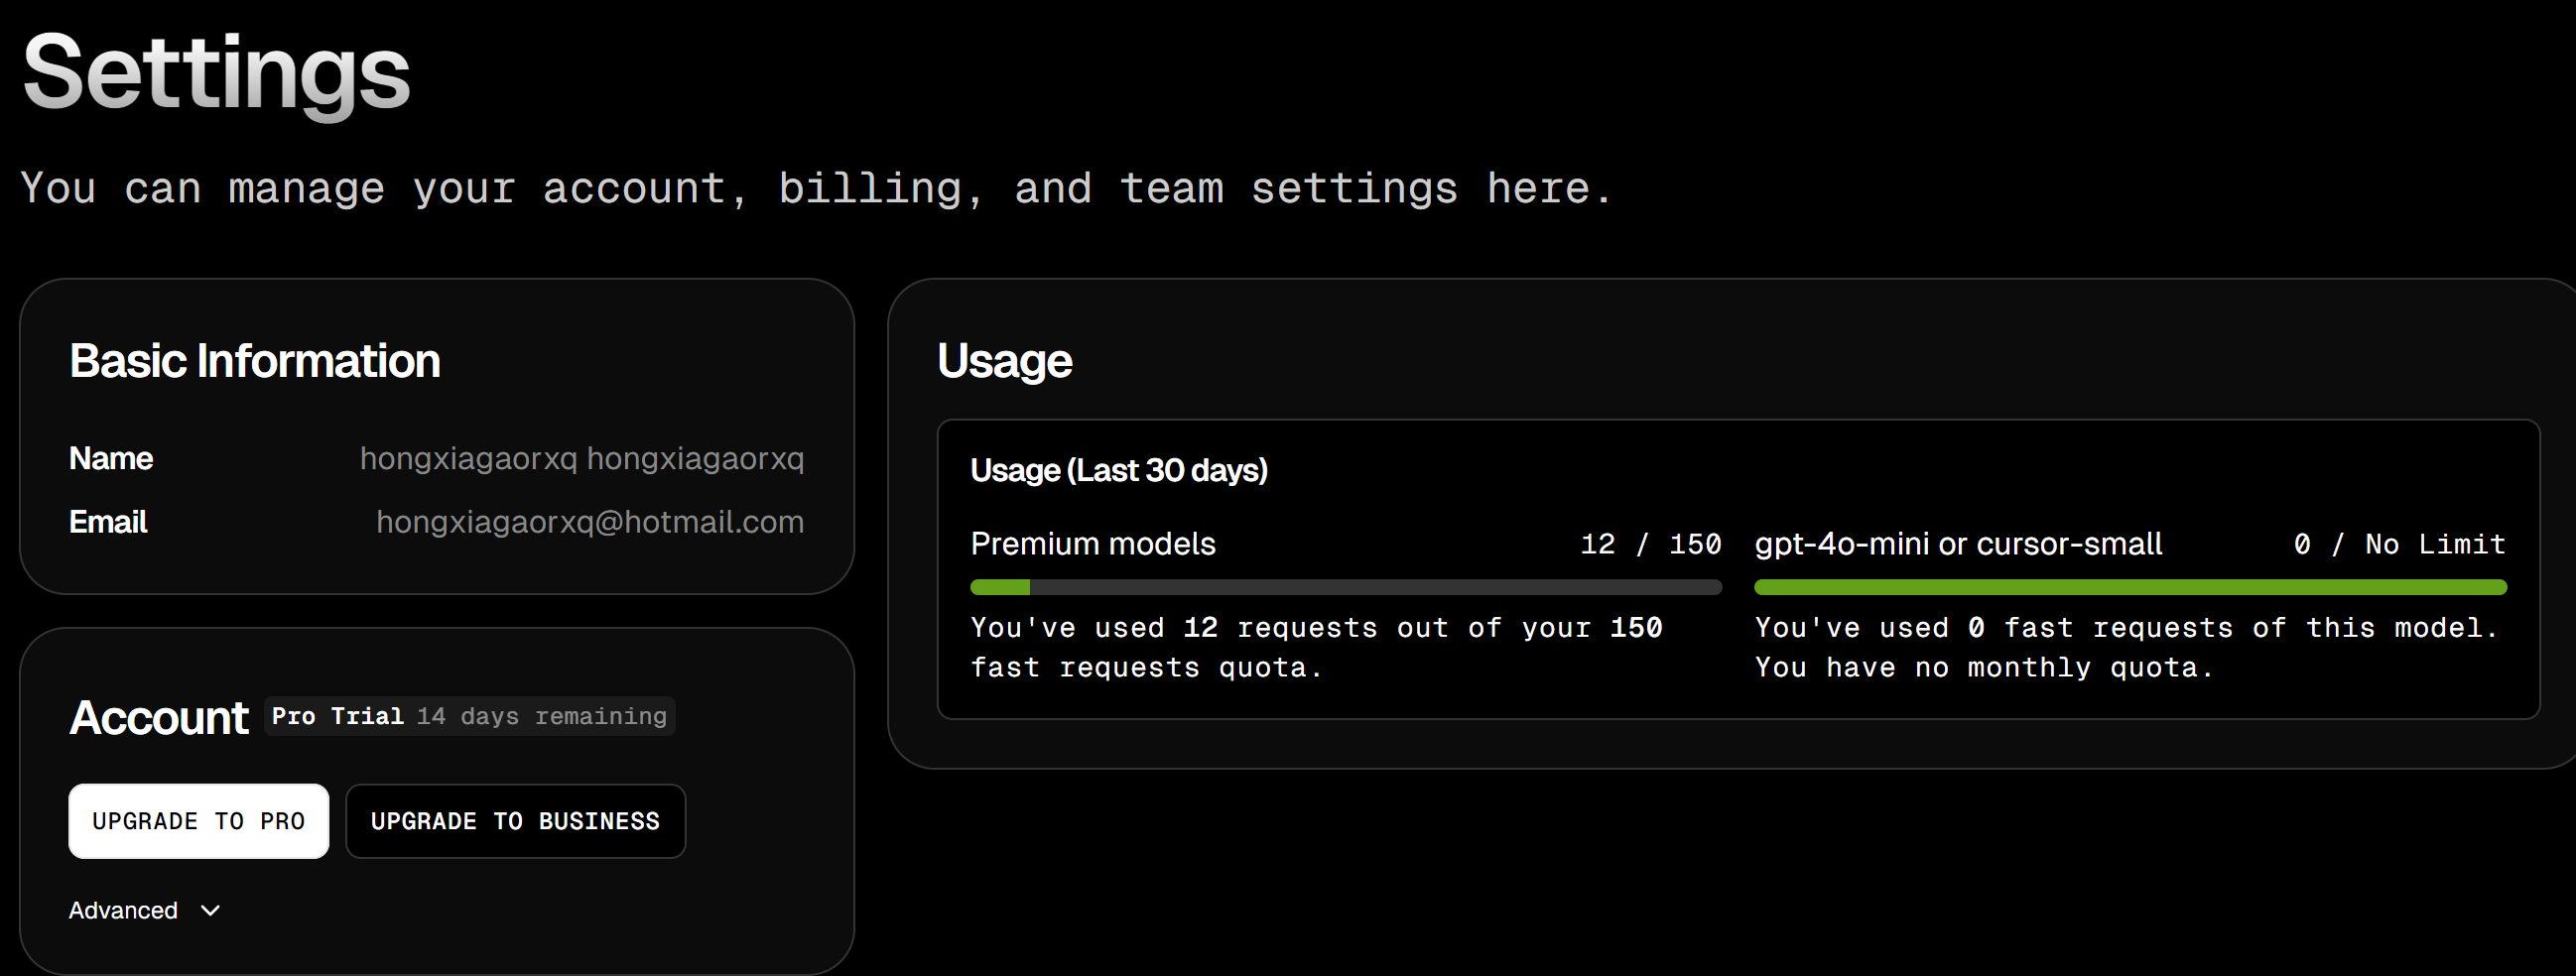
- 基本信息 (Basic Information)部分:
- 用户名 (Name): hongxiagaorxq hongxiagaorxq
- 电子邮箱 (Email): hongxiagaorxq@hotmail.com
- 账户信息 (Account)部分:
- 当前是Pro Trial账户,还剩14天试用期
- 有两个升级选项按钮:
- "UPGRADE TO PRO" (升级到专业版)
- "UPGRADE TO BUSINESS" (升级到商业版)
- 使用情况 (Usage)部分:
- 最近30天的使用统计
- Premium模型使用情况:已使用12次,总额度150次
- GPT-4o-mini或cursor-small模型:已使用0次,无使用限制
- 页面顶部说明: "You can manage your account, billing, and team settings here." (您可以在此管理您的账户、账单和团队设置)
4. Cursor支付信息 #
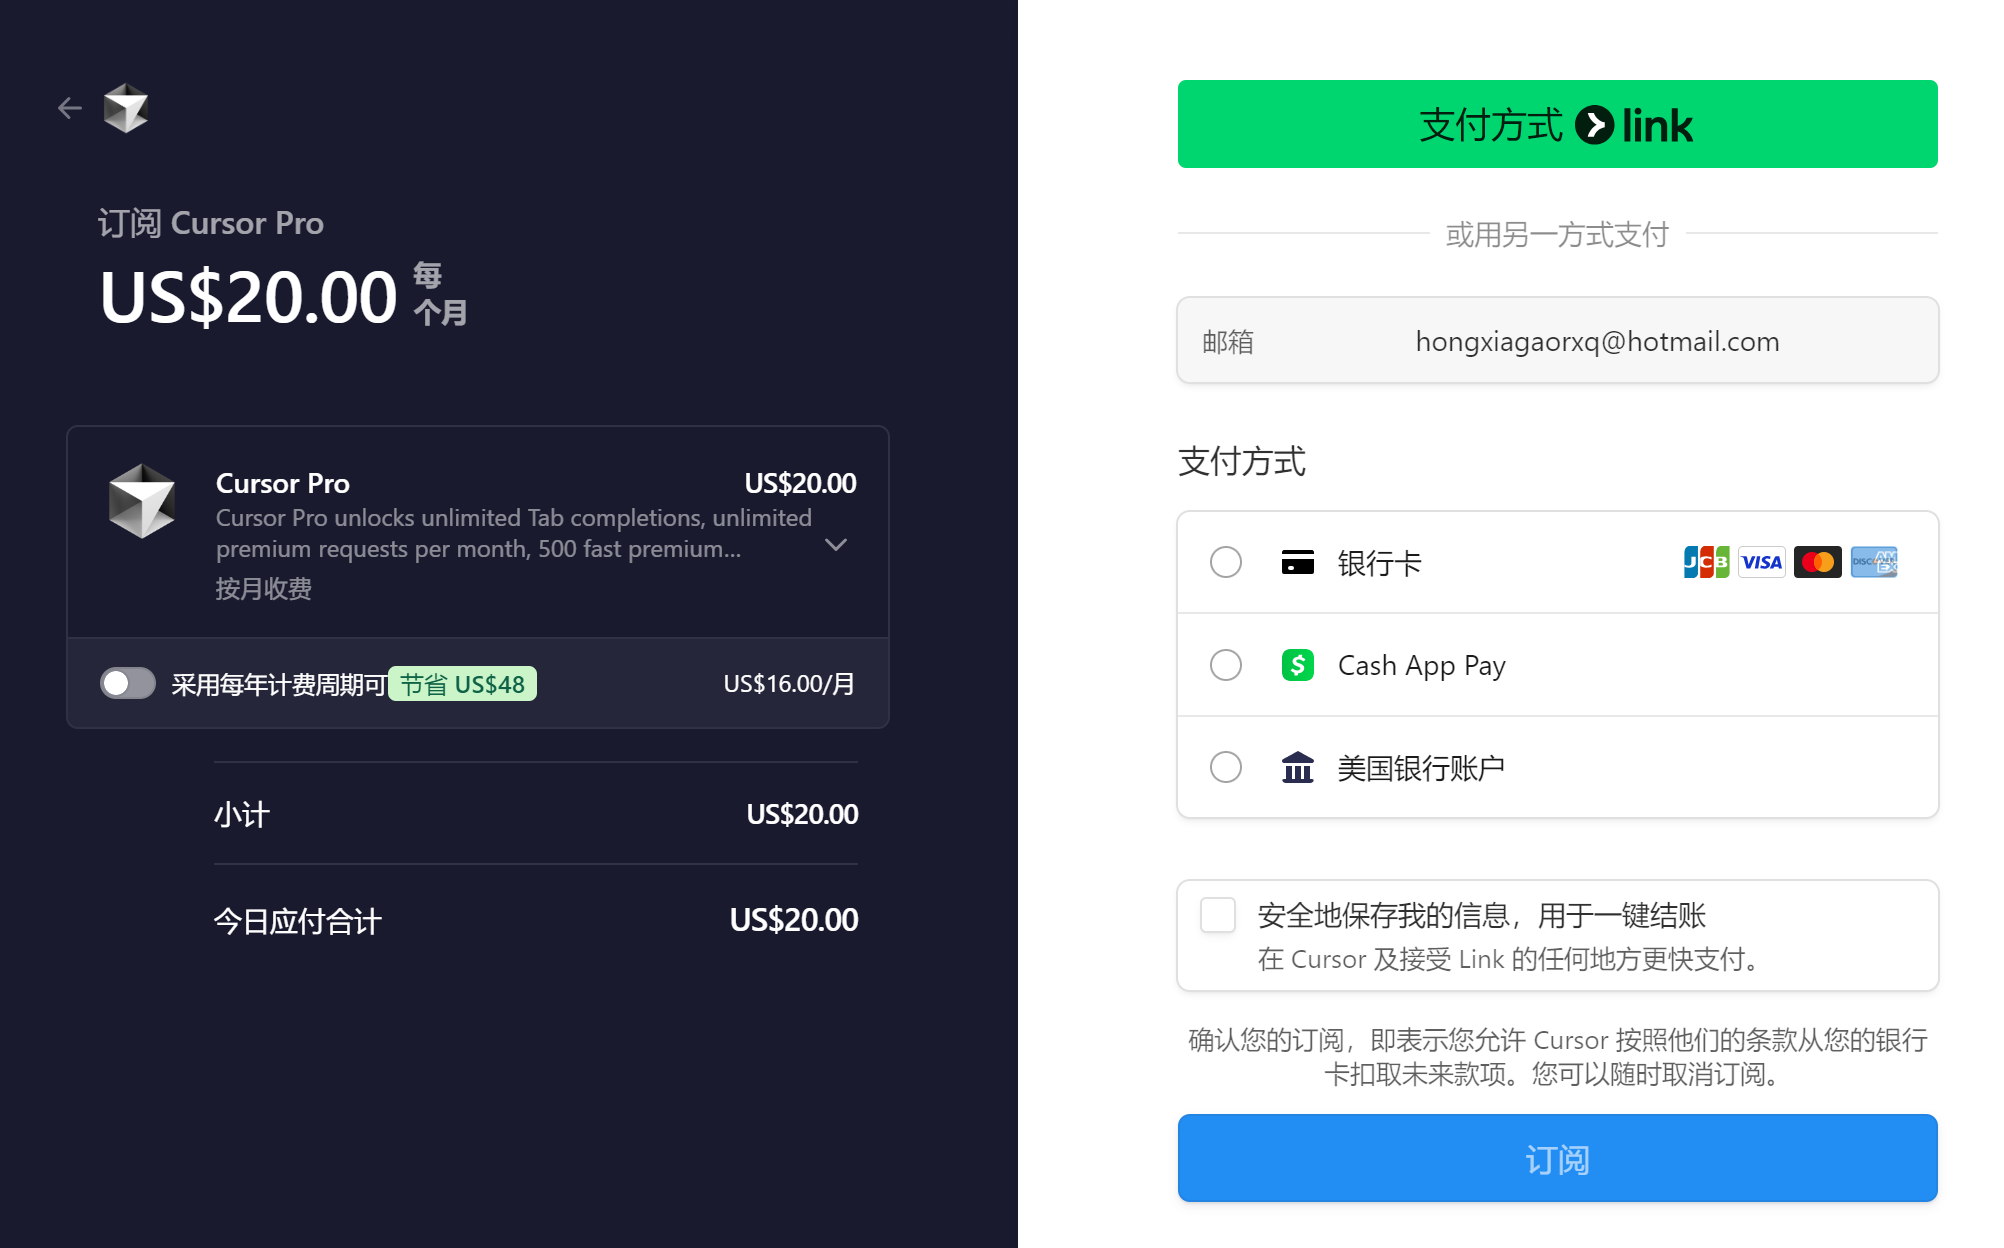
- 价格信息:
- 每月订阅价格为 US$20.00
- 如果选择年付方案可以节省 US$48,每月折合 US$16.00
- 付款选项:
- 银行卡支付(支持 JCB、Visa、Mastercard、American Express)
- Cash App Pay
- 美国银行账户
- 订阅内容: Cursor Pro 版本包含:
- 无限制的 Tab 补全功能
- 无限制的高级请求
- 500个快速高级请求
- 其他高级功能
- 付款流程:
- 需要填写邮箱地址
- 可以选择保存支付信息以便将来使用
- 有确认订阅按钮
- 支持随时取消订阅
5. Cursor定价 #
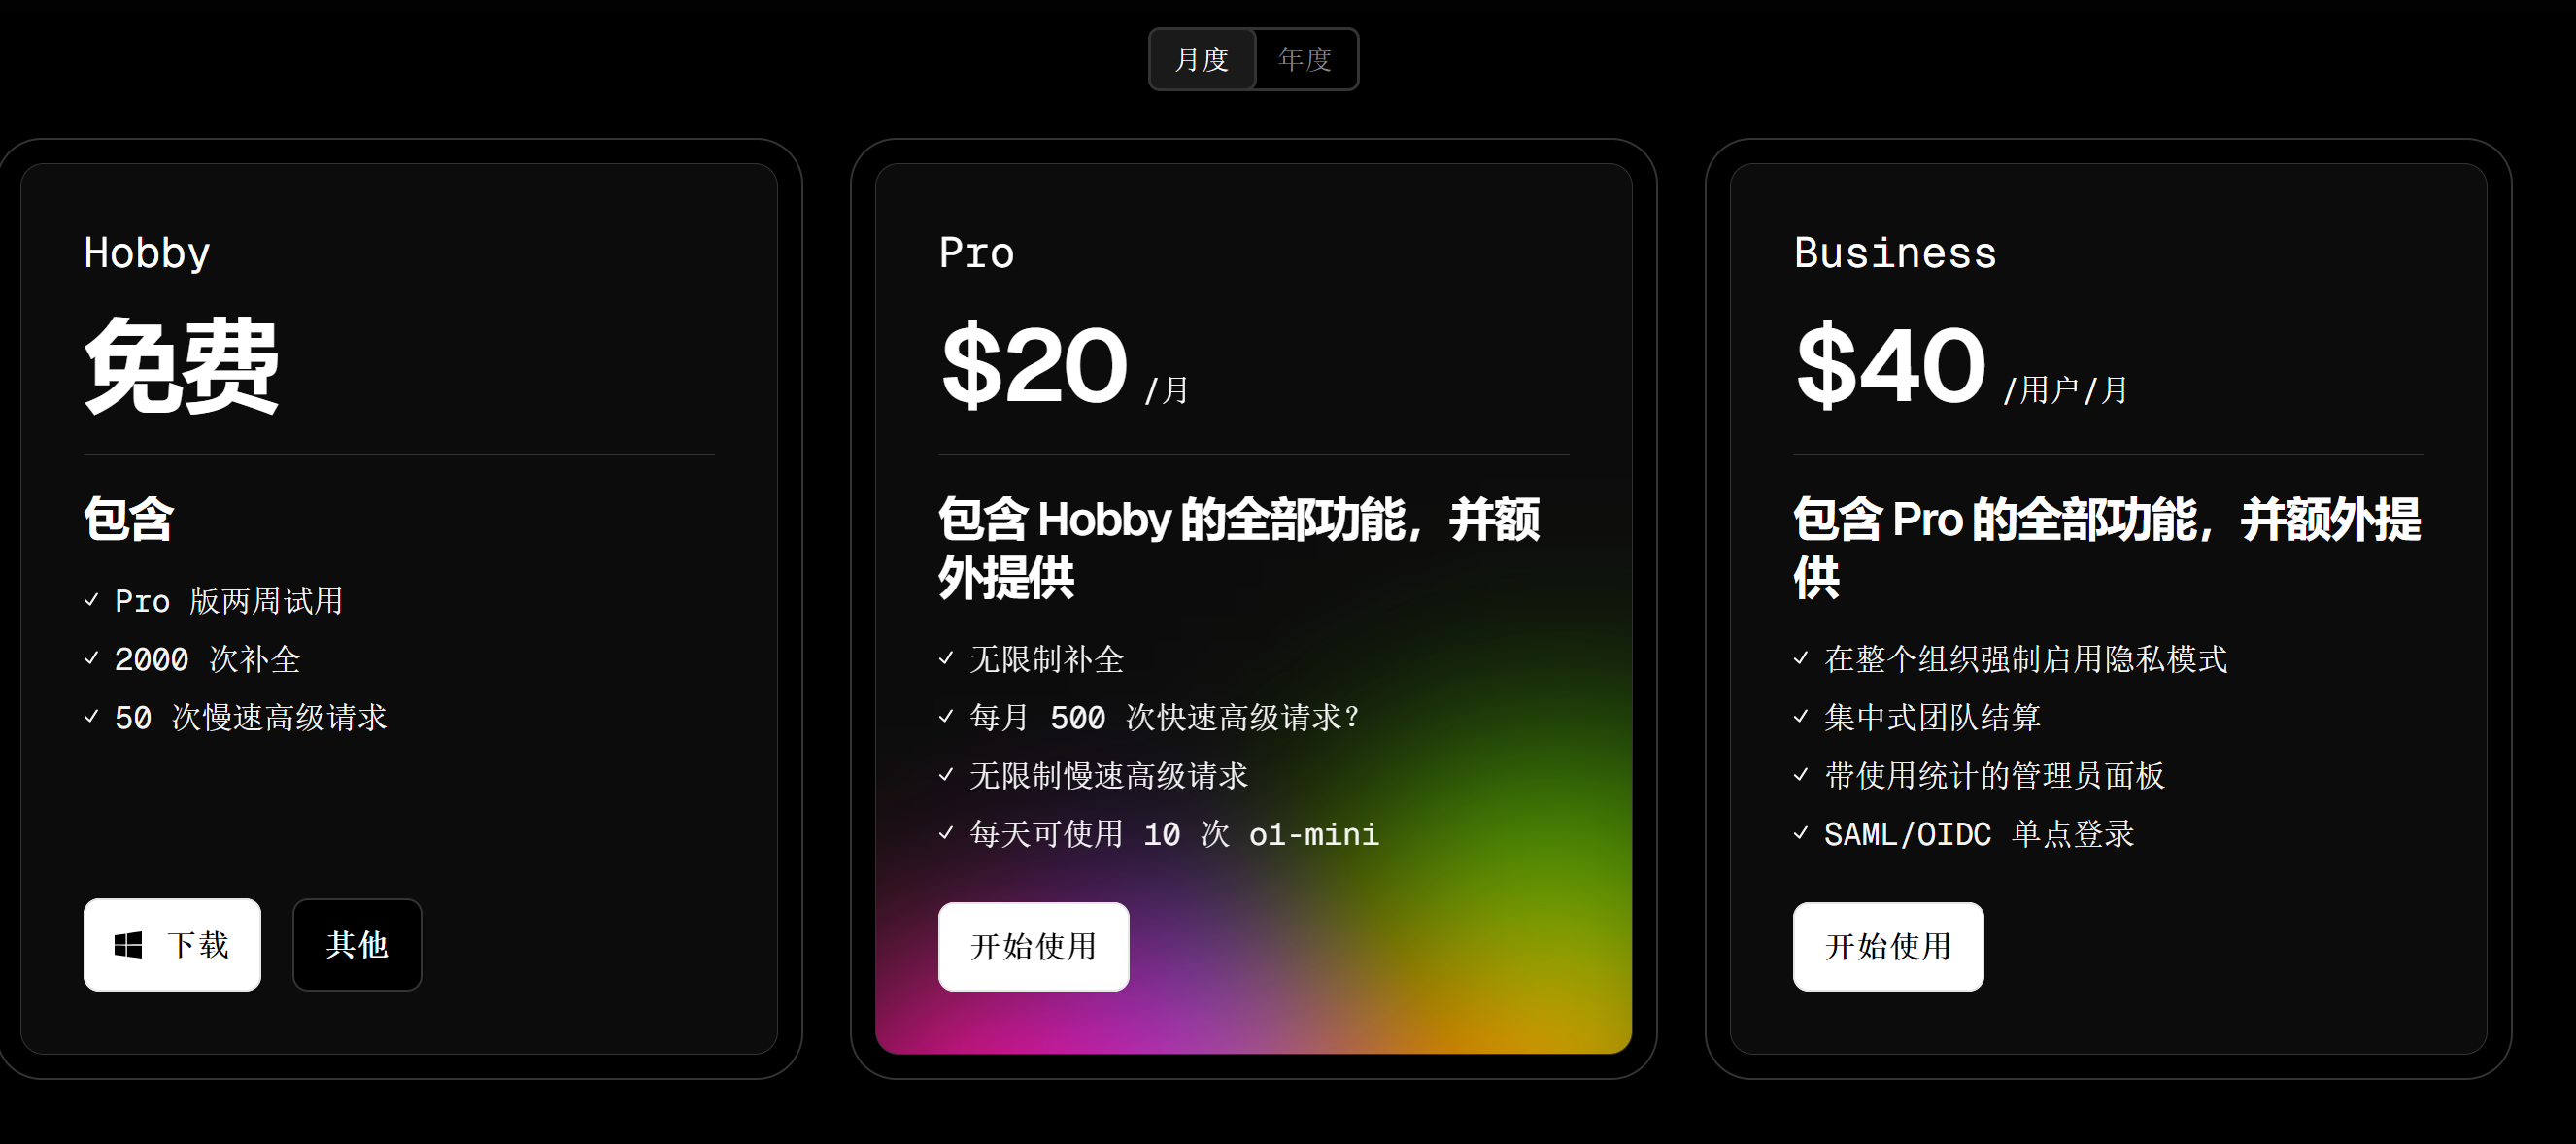
为什么 Cursor 不是完全免费? 大型语言模型的运行成本相当高。为了在不影响服务质量的前提下实现可持续发展,我们需要覆盖这些成本。
什么是高级模型? GPT-4、GPT-4o 和 Claude 3.5 Sonnet 都属于高级模型。每月可使用 500 次快速请求和无限次慢速请求。每次调用 Claude 3.5 Haiku 等于 1/3 次高级请求。
在 Cursor 中生成的代码归谁所有? 所有权归你!无论使用免费版、Pro 版还是 Business 版,生成的代码都完全属于你,可自由用于商业等任何用途。
什么是快速请求和慢速请求? 高级模型的快速请求会被后端优先处理。在 Pro 版中,达到快速请求上限后仍可使用高级模型,但在高负载时请求可能会排队。
各方案的限制如何运作? 如果你超出限制,我们会礼貌地要求你升级。你可免费使用最多 50 次高级模型请求。
你存储了哪些代码? 启用“隐私模式”后,你的代码只会保存在本地,且不会被训练。否则,我们可能会收集使用量和遥测数据(包括提示、代码片段、编辑器操作),以改进 Cursor。
什么是 Cursor Tab? 这是 Cursor 的原生自动补全功能。它比 Copilot 更强大,能提供更完整的差异建议并具有更好的上下文记忆。
7.Cursor 的所有功能都能用 API 密钥吗? 有些重要功能(包括 Tab 和聊天应用编辑功能)由自定义模型驱动,无法通过 API 密钥来支付。
8.我可以在哪里提更多问题? 欢迎加入我们的论坛分享想法!如果你想私下沟通,也可直接给我们发邮件。
6. 界面介绍 #
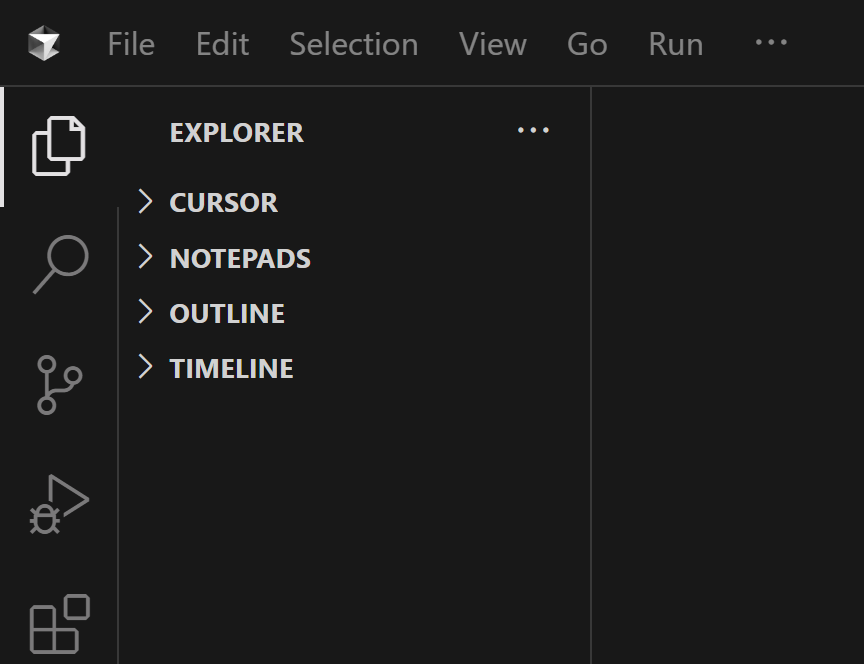
顶部菜单栏:
File:文件操作菜单Edit:编辑操作菜单Selection:选择操作菜单View:视图设置菜单Go:导航菜单Run:运行相关菜单...:更多选项菜单
左侧工具栏图标(从上到下):
- 📄 文件浏览器图标
- 🔍 搜索图标
- 🔀 源代码管理/Git图标
- ▶️ 调试/运行图标
- ⬚ 扩展/布局图标
7. Cursor设置 #
- 点击右上角的齿轮图标进入设置界面
- 输入快捷键
Ctrl+Shift+J进入Cursor设置界面 - 输入快捷键
Ctrl+Shift+P打开命令面板,输入Cursor Settings进入Cursor设置界面
8. 设置语言为中文 #
- Chinese (Simplified) (简体中文) Language Pack for Visual Studio Code
- 输入快捷键
Ctrl+Shift+P打开命令面板,输入Configure Display Language进入语言选择界面
9. 设置工具栏位置 #
- 输入快捷键
Ctrl+Shift+P打开命令面板,输入VS Code Settings进入设置界面 - 搜索
Activity Bar:Orientation,选择vertical
10. Cursor设置 #
10.1 General #
10.1.1 Account #

顶部显示"Account"标题,旁边有"Pro Trial"(专业版试用)标签
当前登录状态信息:
- 显示"You are currently signed in with hongxiagorxq@hotmail.com"
- 表明用户当前使用该邮箱账号登录
页面底部有三个按钮:
- "Upgrade to Pro"(升级到专业版)- 显示为蓝色突出按钮
- "Manage"(管理)- 显示为普通按钮
- "Log out"(退出登录)- 显示为普通按钮
10.1.2 VS Code Import #
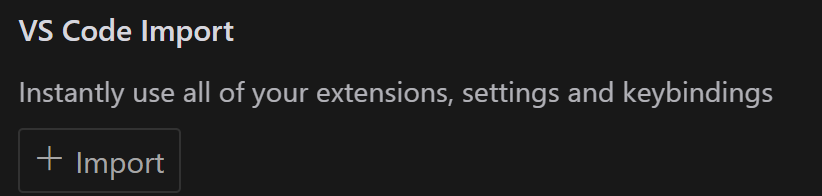
顶部标题显示"VS Code Import"(VS Code导入)
下方有一行说明文字: "Instantly use all of your extensions, settings and keybindings" (立即使用您的所有扩展、设置和键盘快捷键)
界面中有一个"Import"(导入)按钮
这个功能允许用户将Visual Studio Code的配置导入到Cursor中,包括:
- 已安装的扩展插件
- 个人化设置
- 自定义的键盘快捷键
10.1.3 Rules for AI #
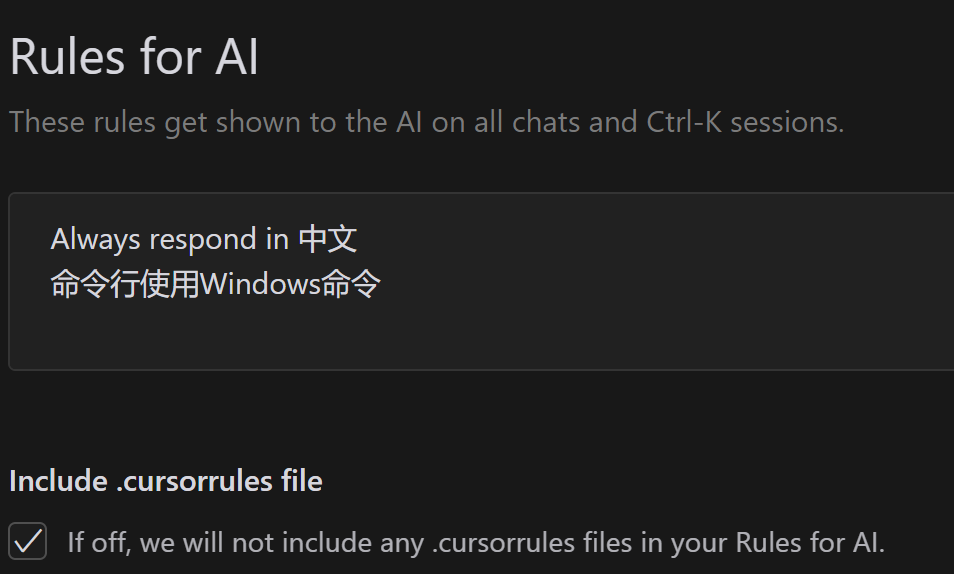
顶部标题显示"Rules for AI"(AI规则)
副标题说明文字: "These rules get shown to the AI on all chats and Ctrl-K sessions." (这些规则会在所有聊天和Ctrl-K会话中显示给AI)
当前设置的AI规则:
- "Always respond in 中文"(始终用中文回复)
- "命令行使用Windows命令"(使用Windows命令行指令)
底部有一个"Include .cursorrules file"(包含.cursorrules文件)选项:
- 有一个复选框可以勾选
- 说明文字:"If off, we will not include any .cursorrules files in your Rules for AI." (如果关闭,我们将不会在您的AI规则中包含任何.cursorrules文件)
这个设置界面允许用户:
- 定制AI助手的行为规则
- 设置与AI交互时的默认语言和命令行偏好
- 控制是否加载外部规则文件
10.1.4 Project Rules #

顶部标题显示"Project Rules"(项目规则)
- 右上角有一个蓝色的"+ Add new rule"(添加新规则)按钮
说明文字描述了项目规则的用途: "Project-specific rules that help the AI understand your codebase and follow your project's conventions. They can be automatically included or fetched by an agent. These are synced with your codebase." (项目特定规则可以帮助AI理解你的代码库并遵循项目的约定。这些规则可以被代理自动包含或获取,并与你的代码库同步。)
当前状态提示: "No project rules found. Click the + button to add a new rule." (未找到项目规则。点击+按钮添加新规则。)
这个界面的主要功能是:
- 允许用户为特定项目设置AI行为规则
- 确保AI助手能够理解并遵循项目的编码规范和约定
- 支持规则与代码库的自动同步
- 提供简单的方式添加新规则
.cursor\rules\functional.mdc
# TypeScript React Component Rules

## Description
use functional component

## Globs
*.tsx

## Rule Content

When working with TypeScript React files (*.tsx), please follow these guidelines:

1. Always use functional components instead of class components
2. Use arrow function syntax for component definitions
3. Include proper TypeScript type annotations for props
4. Use React.FC or React.FunctionComponent type when explicit typing is needed

Example of preferred component structure:

```tsx
interface Props {
  // prop types here
}

const ComponentName: React.FC<Props> = ({ props }) => {
  return (
    // JSX here
  );
};
- Avoid using class components unless absolutely necessary
- Prefer hooks over class lifecycle methods
- Use proper prop typing with interfaces or types
`
10.1.5 Editor #
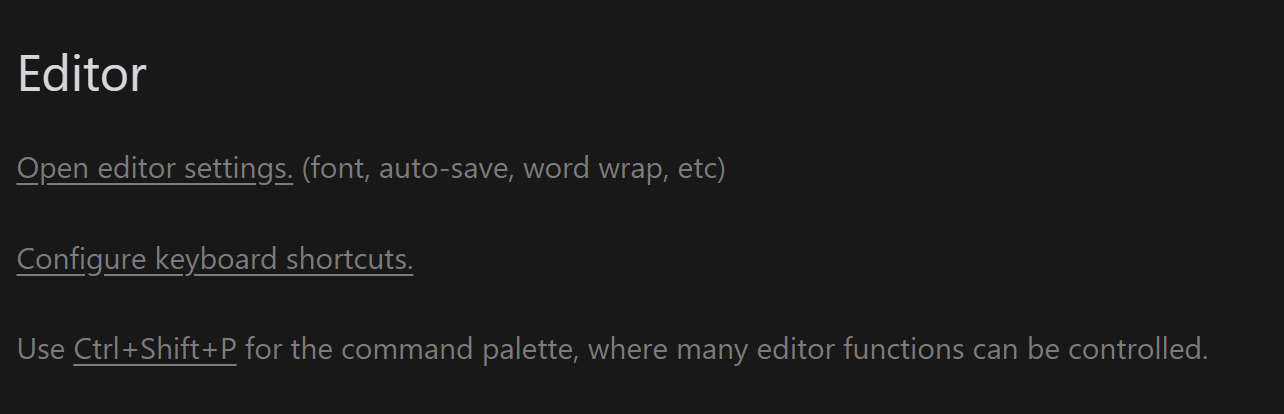
顶部标题显示"Editor"(编辑器)
界面包含三个主要选项:
"Open editor settings."(打开编辑器设置)
- 括号中说明包含:font(字体), auto-save(自动保存), word wrap(自动换行)等设置
"Configure keyboard shortcuts."(配置键盘快捷键)
- 允许用户自定义快捷键设置
提示信息: "Use Ctrl+Shift+P for the command palette, where many editor functions can be controlled." (使用Ctrl+Shift+P打开命令面板,可以在其中控制许多编辑器功能)
这个设置界面提供了:
- 基本的编辑器外观和行为设置
- 快捷键自定义选项
- 命令面板的快速访问提示
10.1.6 Privacy Mode #

顶部标题显示"Privacy mode"(隐私模式)
说明文字解释了隐私模式的功能: "If on, none of your code will be stored by us. If off, we may save prompts and collect telemetry data to improve Cursor." (如果开启,我们不会存储您的任何代码。如果关闭,我们可能会保存提示并收集遥测数据以改进Cursor。)
有一个"Read more"(阅读更多)链接,可以查看更详细的隐私政策
底部有一个下拉选择框:
- 当前显示"disabled"(已禁用)状态
- 可以通过下拉箭头切换隐私模式的开启/关闭
这个设置的主要功能是:
- 控制Cursor是否收集用户代码和使用数据
- 让用户可以选择更高的隐私保护级别
- 提供透明的数据收集政策说明
11. Models #
11.1 Model Names #
这是Cursor软件的模型设置界面,具体内容如下:
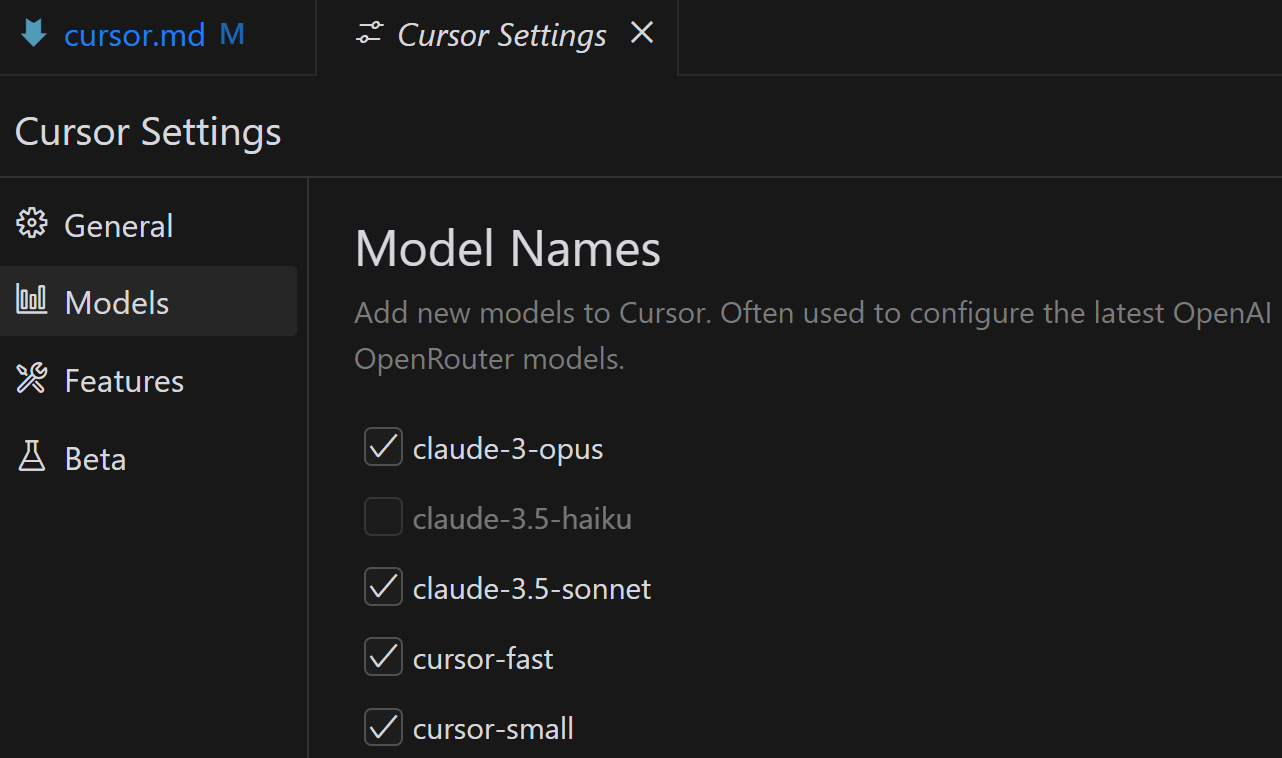
左侧菜单栏显示了几个主要设置项:
- General(通用)
- Models(模型)
- Features(功能)
- Beta(测试版)
主界面标题为"Model Names"(模型名称),下方有说明文字: "Add new models to Cursor. Often used to configure the latest OpenAI OpenRouter models." (向Cursor添加新模型。通常用于配置最新的OpenAI OpenRouter模型。)
当前可选的模型列表:
- ✓ claude-3-opus(已选择)
- □ claude-3.5-haiku(未选择)
- ✓ claude-3.5-sonnet(已选择)
- ✓ cursor-fast(已选择)
- ✓ cursor-small(已选择)
这个设置界面允许用户:
- 选择想要使用的AI模型
- 配置不同的Claude模型版本
- 启用或禁用特定的Cursor专用模型
- 管理模型的可用性
11.2 API Keys #
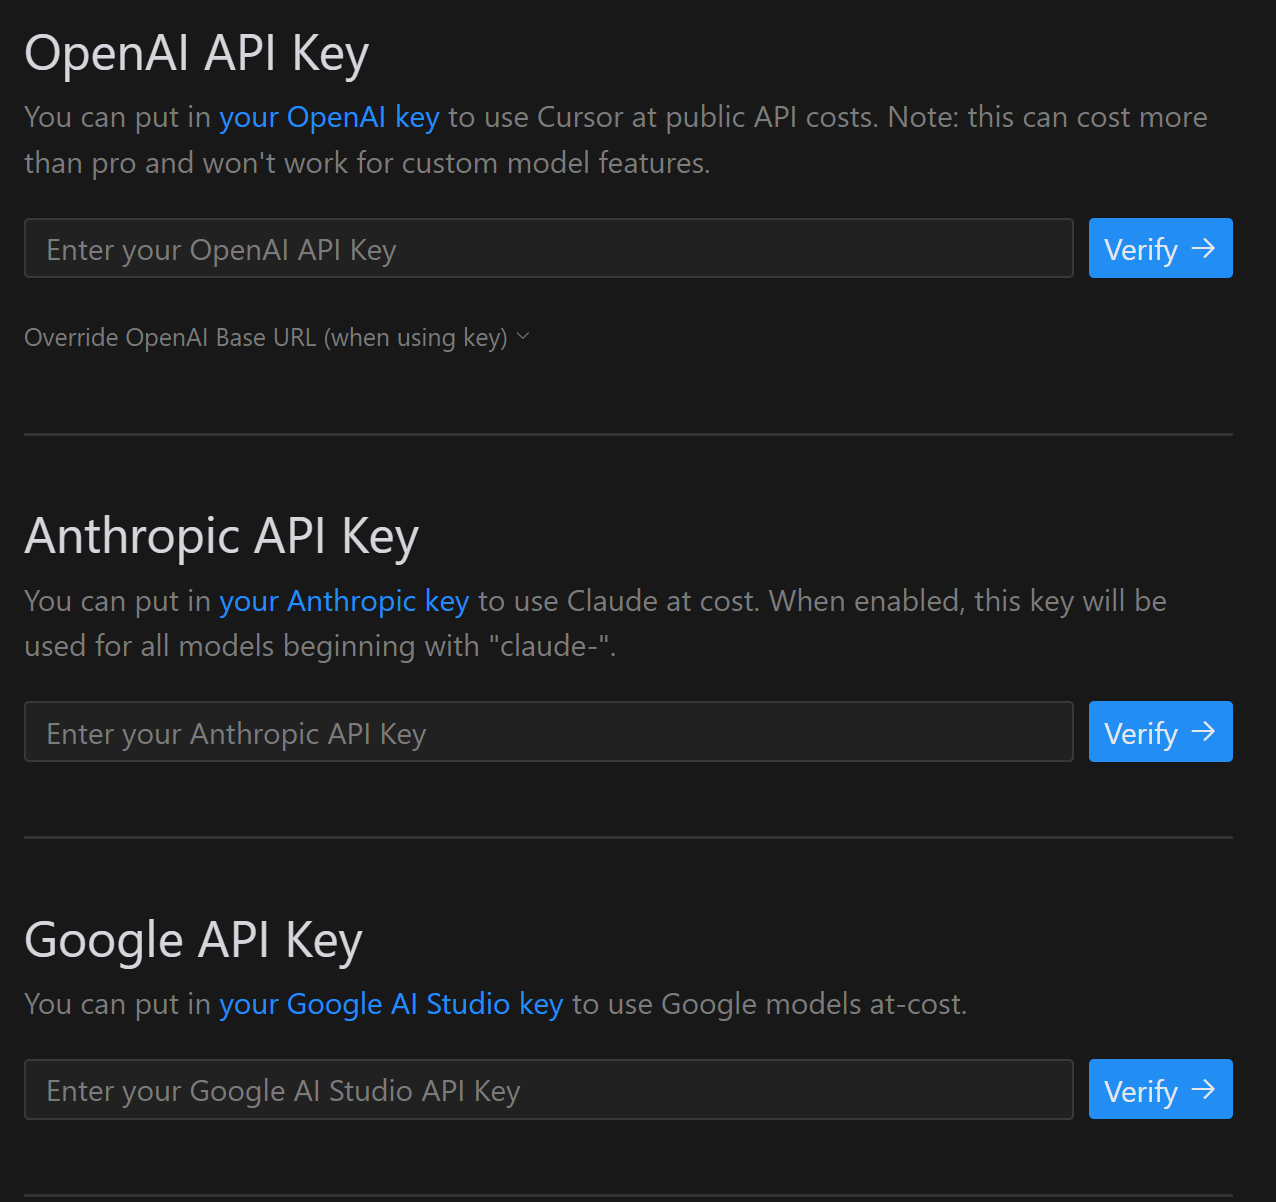
这是Cursor软件的API密钥设置界面,包含三个主要部分:
OpenAI API Key(OpenAI API密钥)
- 说明文字:"You can put in your OpenAI key to use Cursor at public API costs. Note: this can cost more than pro and won't work for custom model features."
- 提供输入框用于输入OpenAI API密钥
- 有"Verify"(验证)按钮
- 包含"Override OpenAI Base URL"(覆盖OpenAI基础URL)的可展开选项
Anthropic API Key(Anthropic API密钥)
- 说明文字:"You can put in your Anthropic key to use Claude at cost. When enabled, this key will be used for all models beginning with 'claude-'."
- 提供输入框用于输入Anthropic API密钥
- 有"Verify"(验证)按钮
Google API Key(Google API密钥)
- 说明文字:"You can put in your Google AI Studio key to use Google models at-cost."
- 提供输入框用于输入Google AI Studio API密钥
- 有"Verify"(验证)按钮
这个设置界面的主要功能是:
- 允许用户配置不同AI服务提供商的API密钥
- 支持使用自己的API密钥来访问各种AI模型
- 提供验证功能确保API密钥有效
- 可以自定义OpenAI的基础URL
12. Azure API Key #
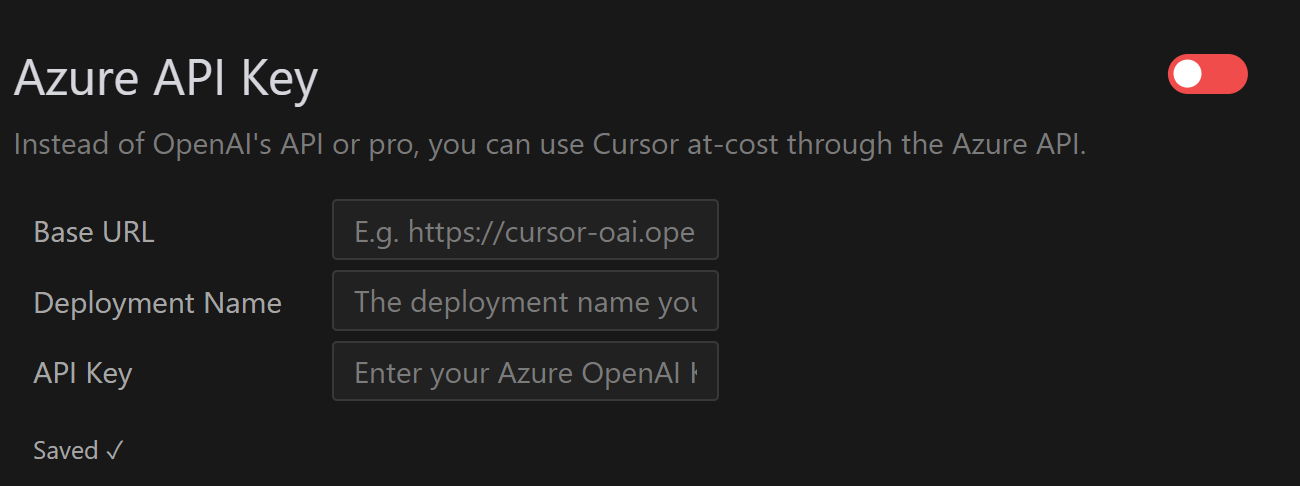
这是Cursor软件的Azure API密钥设置界面,具体内容如下:
标题:"Azure API Key"(Azure API密钥)
- 右上角有一个开关按钮
说明文字: "Instead of OpenAI's API or pro, you can use Cursor at-cost through the Azure API." (除了OpenAI的API或专业版之外,您还可以通过Azure API按成本使用Cursor。)
设置项包含三个输入字段:
Base URL(基础URL)
- 示例:E.g. https://cursor-oai.ope
Deployment Name(部署名称)
- 提示文字:The deployment name you...
API Key(API密钥)
- 提示文字:Enter your Azure OpenAI Key
底部显示"Saved ✓"(已保存)状态提示
这个设置界面的主要功能是:
- 允许用户配置Azure OpenAI服务的连接信息
- 提供完整的Azure服务配置选项
- 作为OpenAI API的替代方案
- 支持自定义部署配置
13. Features #
13.1 Cursor Tab #
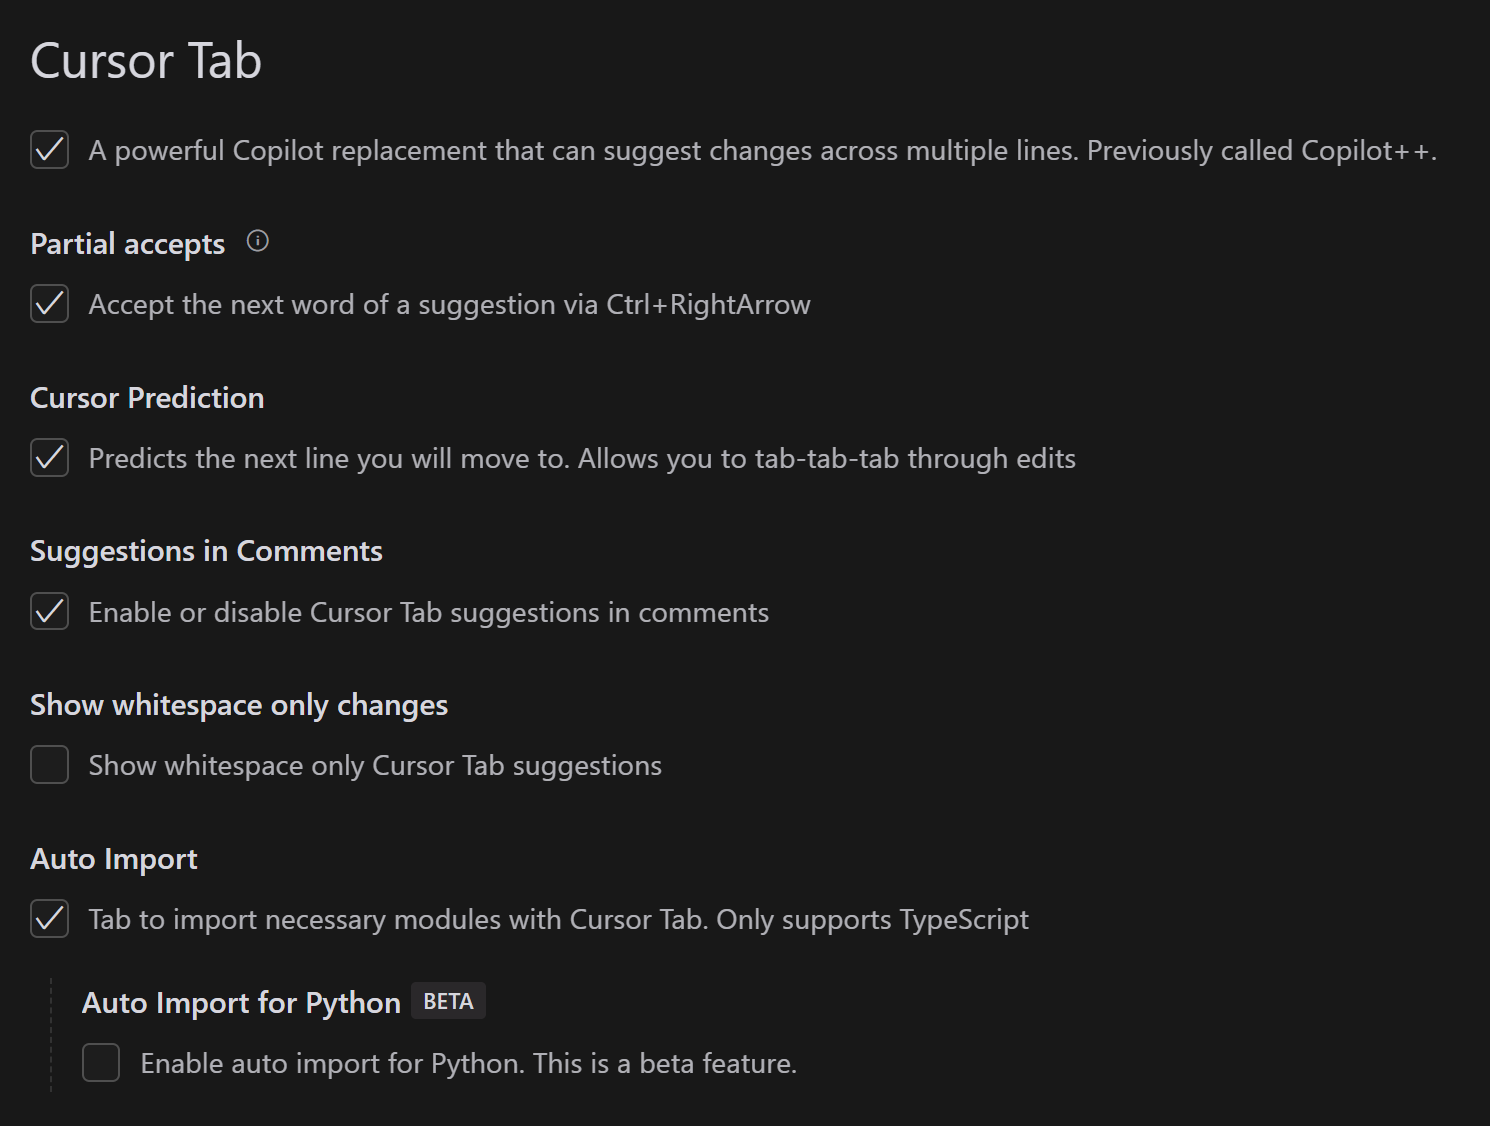
这是Cursor软件的Cursor Tab功能设置界面,包含以下几个主要部分:
Cursor Tab主功能
- ✓ 已启用
- 说明:"A powerful Copilot replacement that can suggest changes across multiple lines. Previously called Copilot++." (一个强大的Copilot替代品,可以跨多行提供代码建议。之前称为Copilot++)
Partial accepts(部分接受)
- ✓ 已启用
- 说明:"Accept the next word of a suggestion via Ctrl+RightArrow" (通过Ctrl+右箭头接受建议的下一个词)
Cursor Prediction(光标预测)
- ✓ 已启用
- 说明:"Predicts the next line you will move to. Allows you to tab-tab-tab through edits" (预测你将移动到的下一行。允许你通过tab键快速完成编辑)
Suggestions in Comments(注释中的建议)
- ✓ 已启用
- 说明:"Enable or disable Cursor Tab suggestions in comments" (启用或禁用注释中的Cursor Tab建议)
Show whitespace only changes(仅显示空白更改)
- □ 未启用
- 说明:"Show whitespace only Cursor Tab suggestions" (显示仅包含空白的Cursor Tab建议)
def example():
print("Hello")
    return True
- Cursor会建议添加4个空格的缩进
- Cursor会建议删除行尾的多余空格
- Cursor会建议删除多余的空行或添加需要的空行
- Auto Import(自动导入)
- ✓ 已启用
- 说明:"Tab to import necessary modules with Cursor Tab. Only supports TypeScript" (使用Tab键通过Cursor Tab导入必要的模块。仅支持TypeScript)
npm install express
npm install @types/express --save-dev

tsx --init
在express上按Ctrl+Space`触发建议
- Auto Import for Python(Python自动导入)- BETA
- □ 未启用
- 说明:"Enable auto import for Python. This is a beta feature." (启用Python的自动导入功能。这是一个测试版功能)
这个设置界面提供了丰富的代码辅助功能配置选项,让用户可以根据个人偏好来自定义Cursor Tab的行为。界面采用复选框设计,方便用户快速开启或关闭各项功能。特别注意的是,一些功能还在测试阶段,比如Python的自动导入功能。
13.2 Chat & Composer #
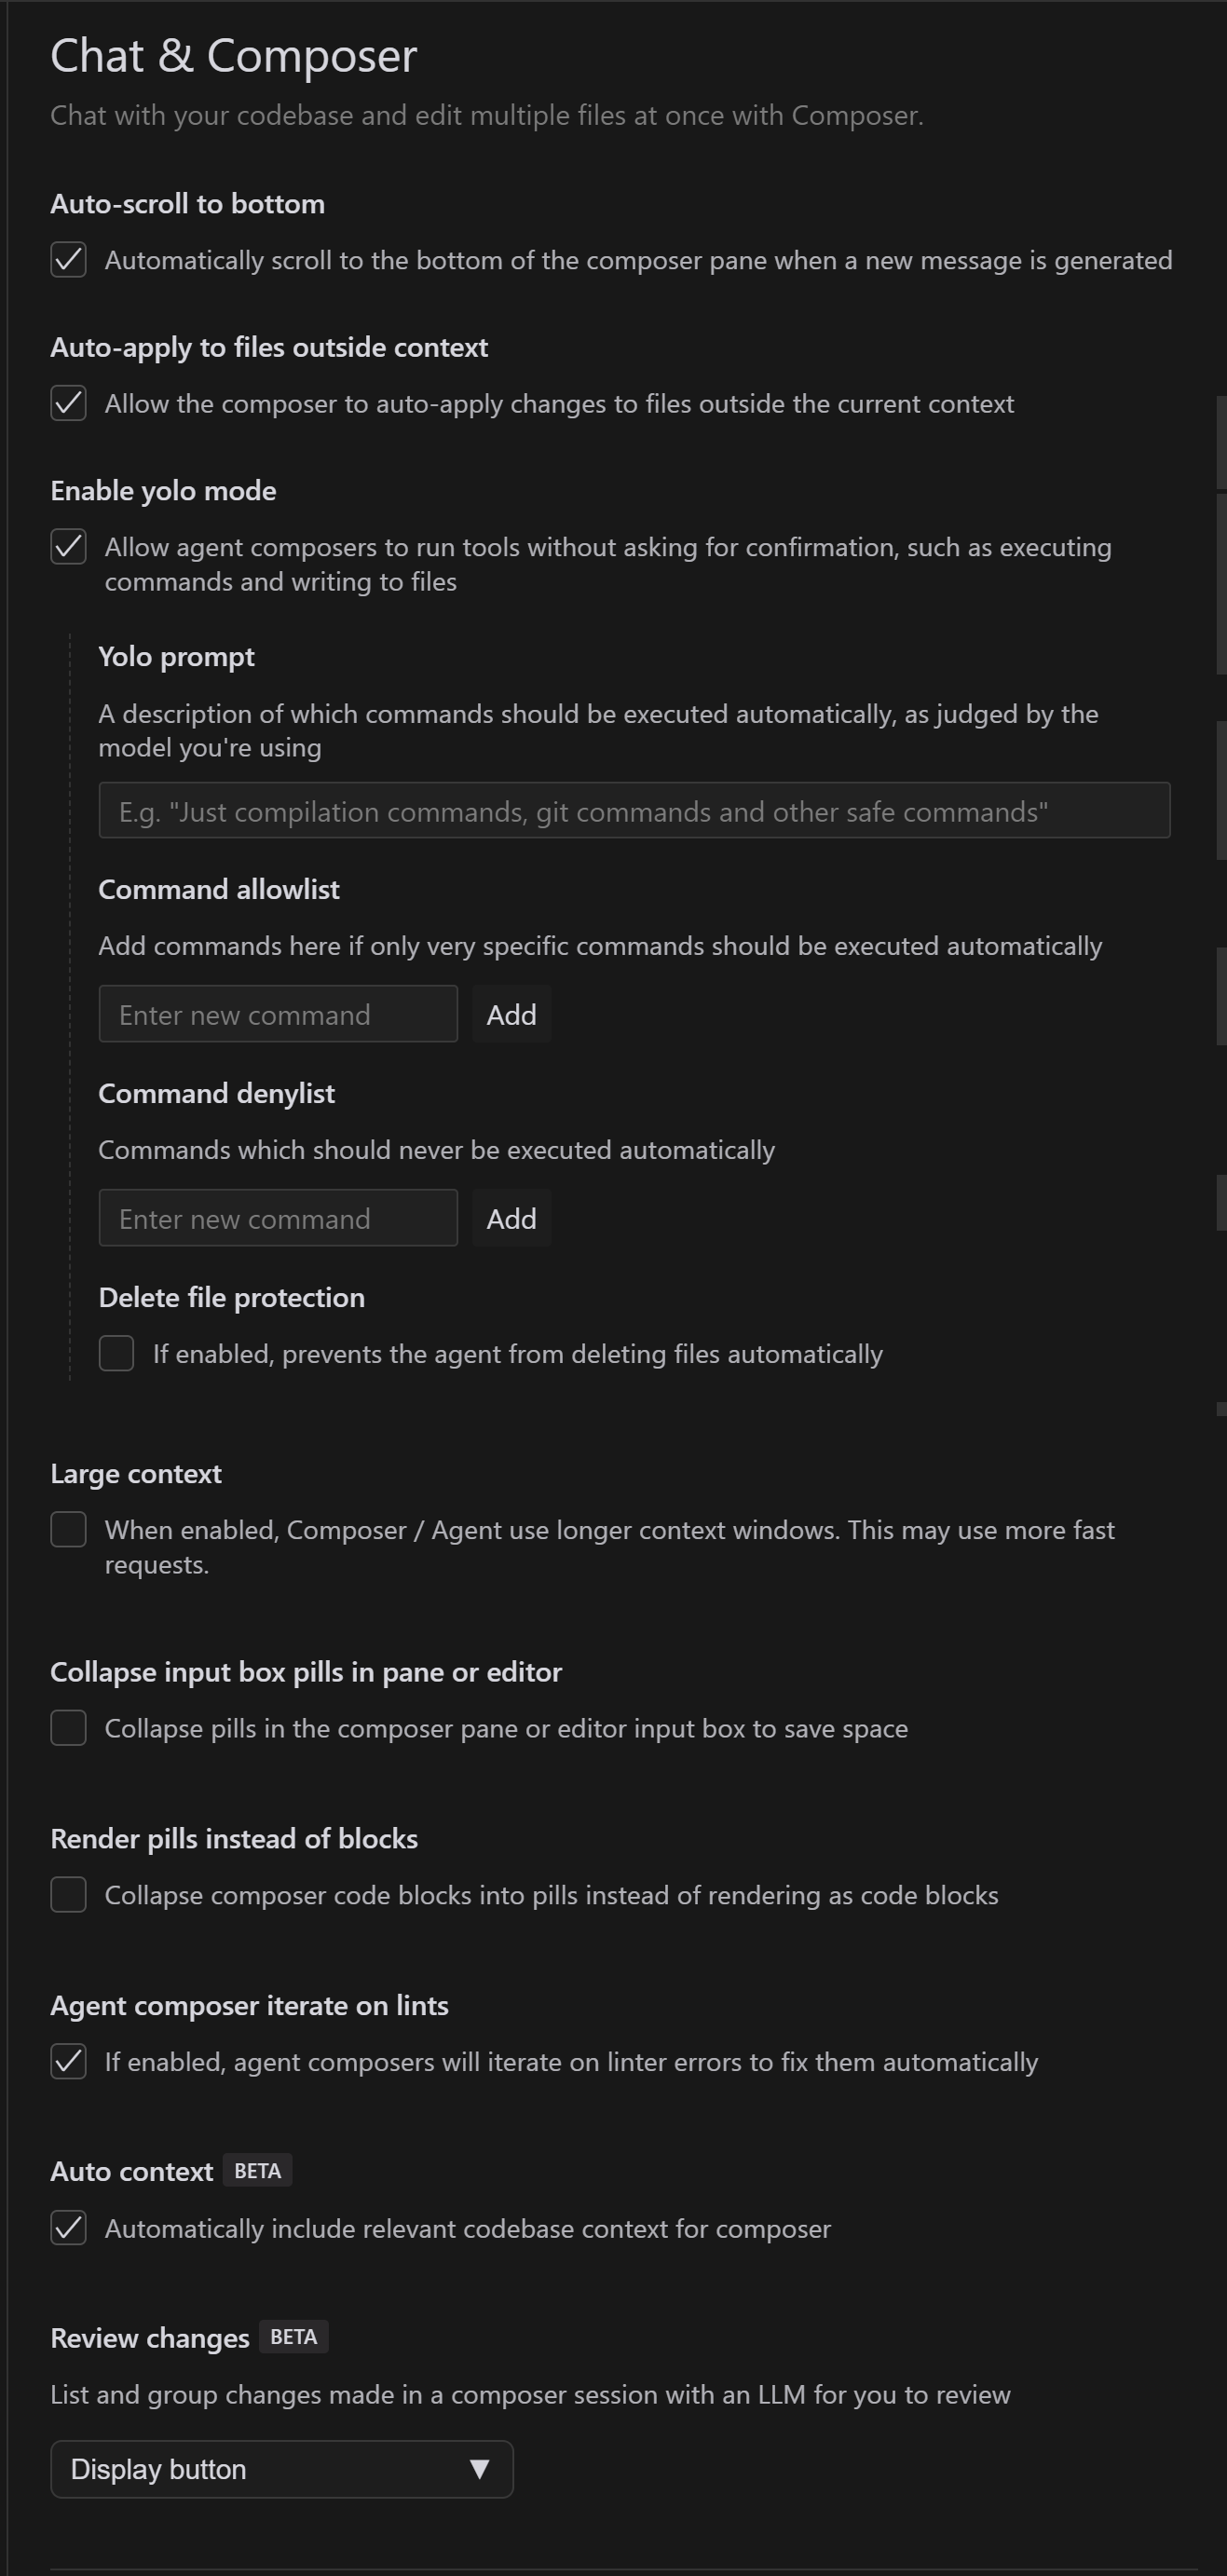
这张是Cursor的聊天和编辑器设置界面,包含多个功能选项:
Auto-scroll to bottom(自动滚动到底部)
- ✓ 已启用
- 当新消息生成时自动滚动到编辑器窗格底部
Auto-apply to files outside context(自动应用到上下文外的文件)
- ✓ 已启用
- 允许编辑器自动将更改应用到当前上下文之外的文件
Enable yolo mode(启用yolo模式)
- ✓ 已启用
- 允许代理编辑器无需确认即可执行命令和写入文件
- 包含两个子设置:
- Yolo prompt(命令描述)
- Command allowlist(允许的命令列表)
- Command denylist(禁止的命令列表)
- Delete file protection(删除文件保护)- □ 未启用
Large context(大上下文)
- □ 未启用
- 启用后编辑器使用更大的上下文窗口,可能会使用更多快速请求
Collapse input box pills(折叠输入框标签)
- □ 未启用
- 在编辑器窗格中折叠标签以节省空间
Render pills instead of blocks(使用标签替代代码块)
- □ 未启用
- 将编辑器代码块折叠成标签而不是渲染为代码块
Agent composer iterate on lints(代理编辑器迭代修复lint错误)
- ✓ 已启用
- 代理编辑器会自动迭代修复lint错误
Auto context(自动上下文)- BETA
- ✓ 已启用
- 自动为编辑器包含相关的代码库上下文
Review changes(审查更改)- BETA
- 列出并分组在编辑器会话中由LLM做出的更改供审查
- 包含Display button(显示按钮)下拉选项
这些设置主要用于:
- 控制编辑器的自动化行为
- 管理代码更改的应用方式
- 配置界面显示偏好
- 设置安全相关的限制
- 启用实验性功能
13.3 CodeBase Indexing #
这是Cursor的代码库索引设置界面,主要内容如下:
标题:"Codebase Indexing"(代码库索引)
说明文字: "Embeddings improve your codebase-wide answers. Embeddings and metadata are stored in the cloud, but all code is stored locally." (嵌入式向量可以改善你的整个代码库范围的答案。嵌入式向量和元数据存储在云端,但所有代码都存储在本地。)
同步状态显示:
- "Synced"(已同步)
- 显示进度条:100%
- 进度条呈绿色,表示完全同步
操作按钮:
- "Resync Index"(重新同步索引)- 蓝色按钮
- "Delete Index"(删除索引)- 带垃圾桶图标
底部有一个可展开的"Show Settings"(显示设置)选项
这个功能的主要用途是:
- 为代码库建立索引以提供更好的AI辅助功能
- 维护本地代码和云端索引的同步
- 允许用户管理索引数据
- 在保护代码隐私的同时提供智能功能(代码本地存储,只有索引存储在云端)
13.4 MCP Servers #
这是Cursor的MCP(Model Control Protocol)服务器设置界面,包含以下内容:
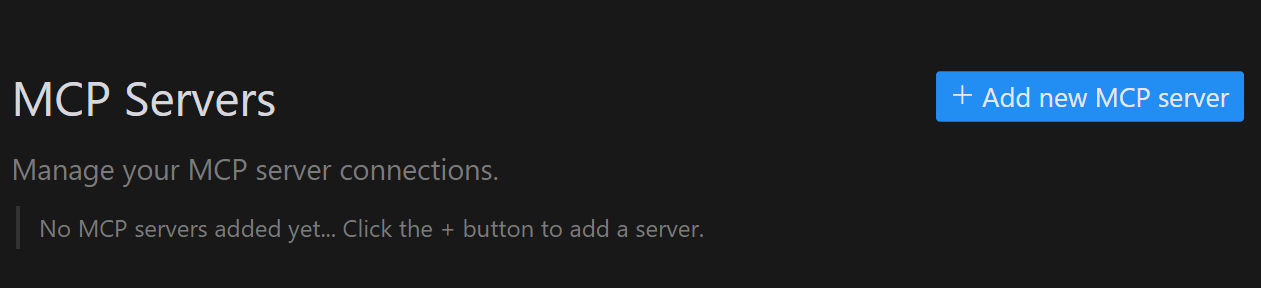
标题:"MCP Servers"
- 右上角有一个蓝色的"+ Add new MCP server"(添加新MCP服务器)按钮
说明文字: "Manage your MCP server connections." (管理你的MCP服务器连接)
当前状态提示: "No MCP servers added yet... Click the + button to add a server." (尚未添加MCP服务器...点击+按钮添加服务器。)
MCP服务器的作用是:
- 允许用户连接自定义的模型服务器
- 管理AI模型的部署和访问
- 提供私有化部署的可能性
- 支持自定义AI模型的集成
13.5 Docs #
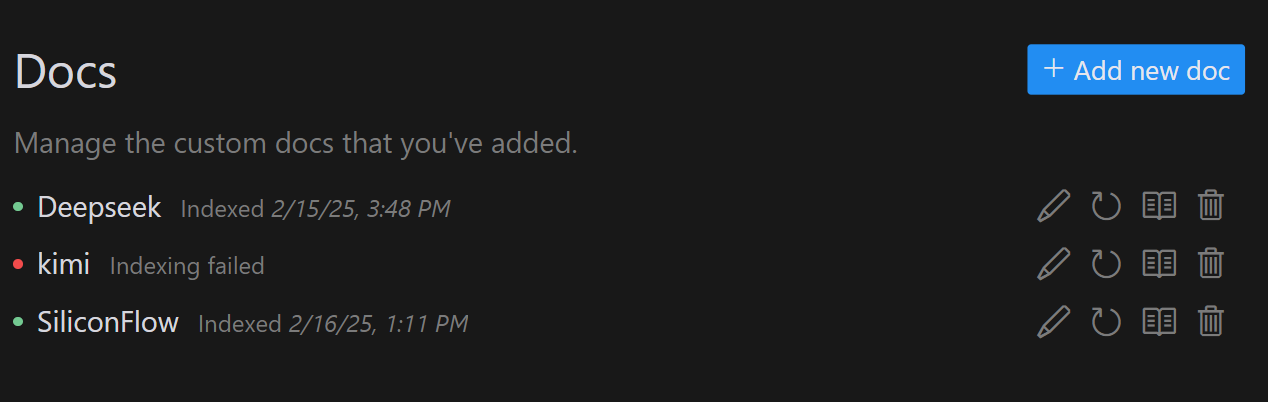
标题:"Docs"(文档)
- 右上角有一个蓝色的"+ Add new doc"(添加新文档)按钮
说明文字: "Manage the custom docs that you've added." (管理你已添加的自定义文档)
当前已添加的文档列表:
Deepseek
- 状态:Indexed 2/15/25, 3:48 PM(已索引)
- 右侧有编辑、刷新、展开和删除按钮
kimi
- 状态:Indexing failed(索引失败)
- 右侧有编辑、刷新、展开和删除按钮
SiliconFlow
- 状态:Indexed 2/16/25, 1:11 PM(已索引)
- 右侧有编辑、刷新、展开和删除按钮
每个文档条目右侧都有四个操作图标:
- 铅笔图标(编辑)
- 循环箭头(刷新)
- 展开图标(查看详情)
- 垃圾桶图标(删除)
这个功能允许用户:
- 添加自定义文档供AI参考
- 管理文档的索引状态
- 更新和维护文档
- 删除不需要的文档
13.6 Editor #
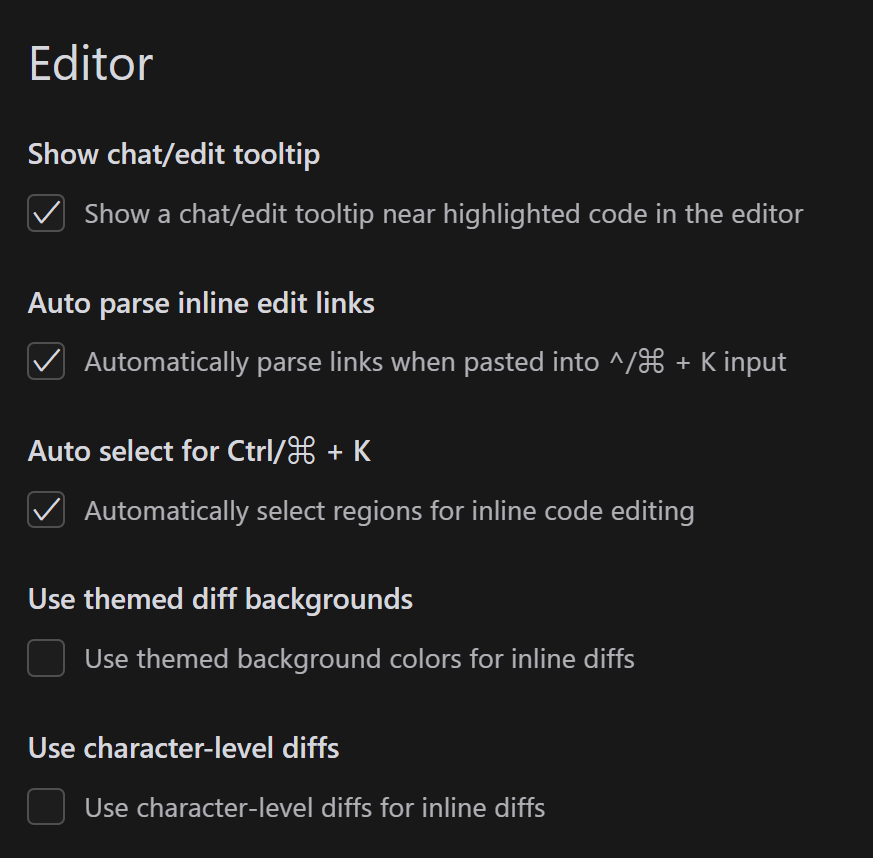
这是Cursor的编辑器设置界面,包含以下功能选项:
Show chat/edit tooltip(显示聊天/编辑工具提示)
- ✓ 已启用
- 说明:"Show a chat/edit tooltip near highlighted code in the editor" (在编辑器中高亮代码附近显示聊天/编辑工具提示)
Auto parse inline edit links(自动解析内联编辑链接)
- ✓ 已启用
- 说明:"Automatically parse links when pasted into ^/⌘ + K input" (在^/⌘ + K输入时自动解析粘贴的链接)
Auto select for Ctrl/⌘ + K(自动选择Ctrl/⌘ + K)
- ✓ 已启用
- 说明:"Automatically select regions for inline code editing" (自动选择区域进行内联代码编辑)
Use themed diff backgrounds(使用主题化差异背景)
- □ 未启用
- 说明:"Use themed background colors for inline diffs" (对内联差异使用主题化背景颜色)
Use character-level diffs(使用字符级差异)
- □ 未启用
- 说明:"Use character-level diffs for inline diffs" (对内联差异使用字符级差异)
这些设置主要用于:
- 控制编辑器中的工具提示显示
- 配置代码编辑和差异比较的行为
- 自定义快捷键功能
- 设置差异显示的视觉效果
- 优化代码编辑体验
13.7 Terminal #
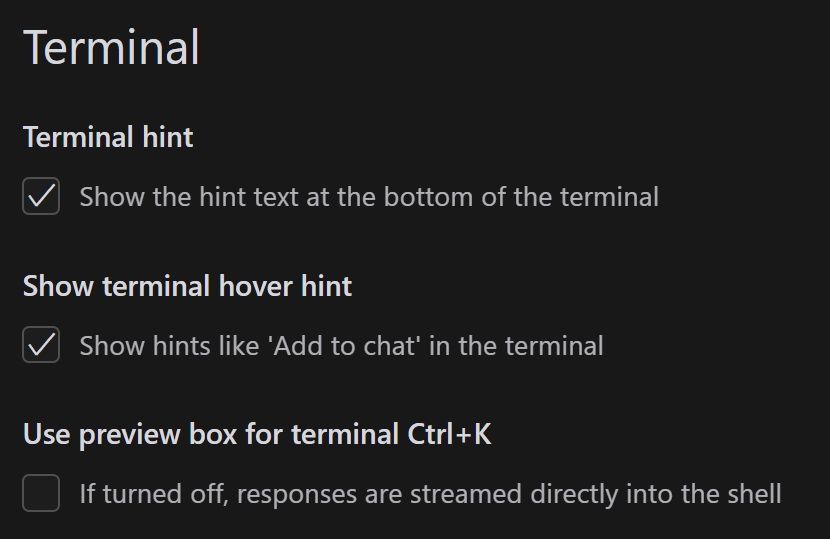
这是Cursor的终端设置界面,包含以下三个选项:
Terminal hint(终端提示)
- ✓ 已启用
- 说明:"Show the hint text at the bottom of the terminal" (在终端底部显示提示文本)
Show terminal hover hint(显示终端悬停提示)
- ✓ 已启用
- 说明:"Show hints like 'Add to chat' in the terminal" (在终端中显示类似"添加到聊天"的提示)
Use preview box for terminal Ctrl+K(终端Ctrl+K使用预览框)
- □ 未启用
- 说明:"If turned off, responses are streamed directly into the shell" (如果关闭,响应将直接流入shell)
这些设置主要用于:
- 控制终端中的提示信息显示
- 配置终端交互体验
- 自定义Ctrl+K快捷键的行为
- 优化终端使用体验
14. Beta #
 这是Cursor的Beta功能设置界面,包含两个实验性功能:
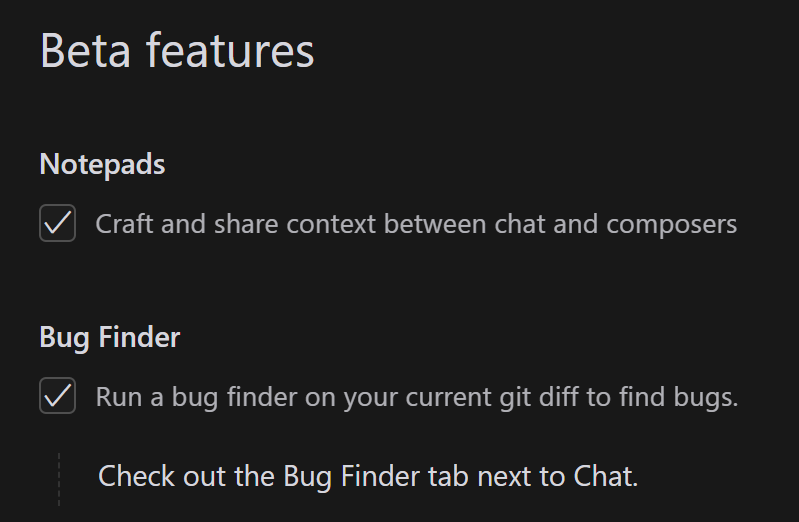
Notepads(记事本)
- ✓ 已启用
- 说明:"Craft and share context between chat and composers" (在聊天和编辑器之间创建和共享上下文)
Bug Finder(Bug查找器)
- ✓ 已启用
- 说明:"Run a bug finder on your current git diff to find bugs." (在当前git差异上运行bug查找器来发现bugs)
- 附加提示:"Check out the Bug Finder tab next to Chat." (查看聊天旁边的Bug Finder标签页)
这些Beta功能的特点:
- 都是实验性的新功能
- 可能还在开发和完善中
- 用户可以提前体验和反馈
- 功能可能不够稳定或完善
15. DeepSeek #
15.1 DeepSeek的Chrome插件 #
开发一个Chrome插件,用于在浏览器中集成Deepseek的提问功能
功能要求如下:
1.插件图标使用`images\deepseek.png`文件
2.插件图标点击后会弹出配置对话框,可以在配置对话框选择服务方、模型和APIKey,先选择服务方,选择完服务方后可以选择它对应的模型,选择完模型后输入对应的APIKey,输入完成后可以点击保存按钮,保存之前要较验APIKey是否正确,如果正确则保存,如果错误则提示错误信息,验证方法可参考[文档](https://docs.siliconflow.cn/cn/api-reference/userinfo/get-user-info)
3.服务方现在支持deepeek官方和硅基流动,使用方式参考文档
4.添加右键弹出菜单向DeepSeek提问,当在页面中选择文字后,可以选择右键菜单向DeepSeek提问打开侧边栏面板,并自动把选中的文字填入到侧边栏面板的提问框中,点击右下角的发送按钮把选中的文字发送给Deepseek,Deepseek返回结果后,在右侧面板中显示结果
5.输出的结果是markdown源代码,所以需要正确把markdown源代码转换显示,还要实现编程语言语法高亮功能
6.侧边栏面板需要可以通过拖动面板边缘调整宽度,并提供全屏/退出全屏按钮,点击后可以在全屏和普通模式之间切换
7.需要能支持多轮对话
8.需要能支持流式响应

其它要求:
1.使用原生JavaScript开发
2.样式框架采用Bootstrap 5
3.需要用到的第三方库不要使用外链链接,而是都下载到当前项目目录进行引用
15.2 .cursorrules #
- 我要编写一个 DeepSeek的Chrome插件,给出推荐的..cursorrules内容
---
description: DeepSeek Chrome Extension Development Rules
globs: ["*.js", "*.ts", "*.json", "*.html", "*.css"]
---

Chrome Extension Development Rules for DeepSeek

Project Structure
- Use manifest.json for extension configuration
- Organize code into src/ directory
- Keep background scripts, content scripts, and popup UI separate
- Follow Chrome Extension V3 standards

Coding Standards
1. Use modern JavaScript/TypeScript features
2. Implement proper error handling for API calls
3. Follow security best practices for extensions
4. Use async/await for asynchronous operations
5. Implement proper message passing between components

DeepSeek Integration
1. Handle API authentication securely
2. Implement rate limiting for API calls
3. Cache responses when appropriate
4. Handle API errors gracefully
5. Follow DeepSeek API best practices

Example Code Structures:

 manifest.json
```json
{
  "manifest_version": 3,
  "name": "DeepSeek Assistant",
  "version": "1.0.0",
  "permissions": [
    "storage",
    "activeTab"
  ],
  "host_permissions": [
    "https://api.deepseek.com/*"
  ]
}
Background Script
// Use service worker pattern
// Handle API calls to DeepSeek
// Manage authentication and storage
Content Script
// Inject UI elements
// Handle user interactions
// Communicate with background script
Popup UI
// Create user-friendly interface
// Implement settings management
// Show API status and usage
Security Guidelines
- Never expose API keys in client-side code
- Use secure storage for sensitive data
- Validate all user inputs
- Implement CSP headers
- Regular security audits
Performance Guidelines
- Minimize API calls
- Use efficient DOM operations
- Implement proper caching
- Optimize resource loading
- Regular performance monitoring
`
15.3 .cursorignore #
我要编写一个 DeepSeek的Chrome插件,给出推荐的.cursorignore内容
# 依赖目录
node_modules/
dist/
build/

# 编译输出
*.js.map
*.css.map

# 开发工具配置
.vscode/
.idea/
*.log

# Chrome插件特定文件
*.crx
*.pem

# 测试文件
__tests__/
*.test.js
*.spec.js

# 临时文件
.DS_Store
.env.local
.env.development.local
.env.test.local
.env.production.local

# 缓存
.cache/
.temp/

# Cursor特定
.cursor/
.cursor-cache/
15.4 Cursor账号 #
- caiminsnks@hotmail.com:8H11L5J8hY6y8:NSmzcoh08
- liuguihuanztpg@hotmail.com:ZR8E8dKXrhA5I:MRop48326978
- guixiangmi@hotmail.com:5671T7P2WnUhF:HZzw95761